

Effectively communicating results is key to the success of any usability study. If you can’t make stakeholders understand the problems you’ve detected, what chance do you have of getting them fixed?
Video is a highly persuasive presentation format that conveys a tangible impression of user behavior. Seeing concrete, visual evidence makes a deeper and more immediate impact than reading a report.
Userfeel makes creating highlights videos almost effortless. This article describes the process step by step, then offers some tips for getting the most out of your highlights.
The basics
So, you’ve conducted a test and are ready to start analysis and reporting. We’ll outline the basic steps first, then talk more about technique later.
To start, note that annotations are the basis for highlight clips. You cannot generate a highlights video without first adding annotations.
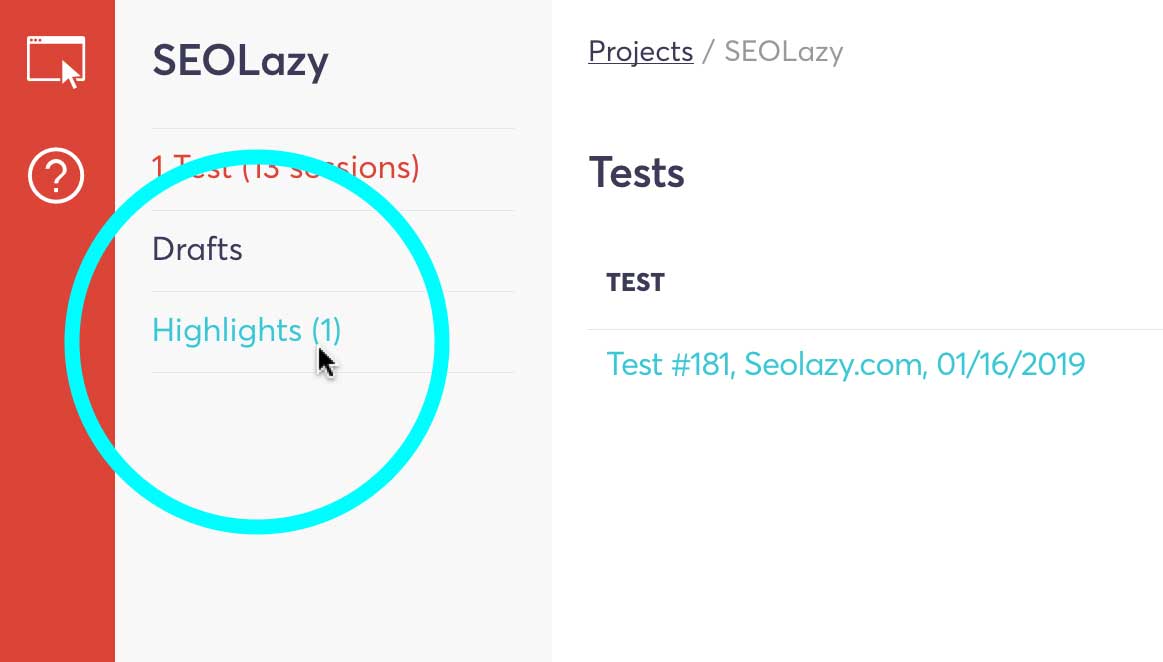
1. Review sessions
From your project, access the test you want to analyze. The test page will show a list of sessions. Selecting the “view” link for any session will allow you to watch and annotate the video.
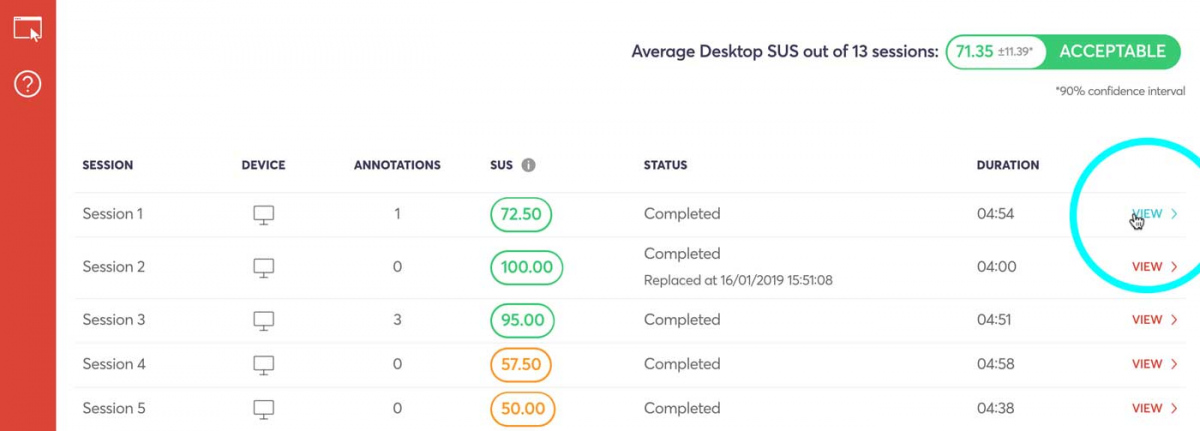
Access a session video from the test page
2. Add annotations to session videos
While viewing a video, add annotations to call out anything meaningful or unusual. Later you will be able to categorize each annotation as a usability problem, bug, comment by the user, or general observation.
You can add annotations via the user interface, but learning our shortcuts will make the process a lot faster. They are:
Space bar | Play or pause |
Shift-Right Arrow | Skip forward 5 seconds |
Shift-Left Arrow | Skip backward 5 seconds |
A | Open annotation dialog |
Shift-A | Open annotation dialog and pause video |
Shift-Space bar | Play or pause while typing an annotation |
Esc | Exit annotation dialog |
Shift-Up Arrow | Increase speed |
Shift-Down Arrow | Decrease speed |
Alt/Option-Up Arrow | Increase volume |
Alt/Option-Down Arrow | Decrease volume |
M | Mute |
? | Show or hide shortcut guide |
When you create a new annotation, it will automatically be applied to the 20 seconds following your current point in the video. You can adjust the time by dragging the edges of the indicator on the progress bar or using the buttons or text fields in the annotation dialog.

Edit times manually or by dragging the indicator on the bar
The portion of the video that corresponds to the annotation is the clip that will be included in the highlights video if you choose to add it. Therefore, it can be helpful to think of annotations as synonymous with clips.
3. Select annotations to add to a highlights video
Once you’ve finished reviewing your sessions, you can start adding clips to a highlights video – although, as we’ll explain in the second part of this article, you should spend some time synthesizing your findings before you jump into creating a video.
On each session page, you will see a list of tasks and annotations below the video player. There are two places from which you can add an annotation (or clip) to a highlights video.
1. From the film reel icon at the right of the annotation in the list:
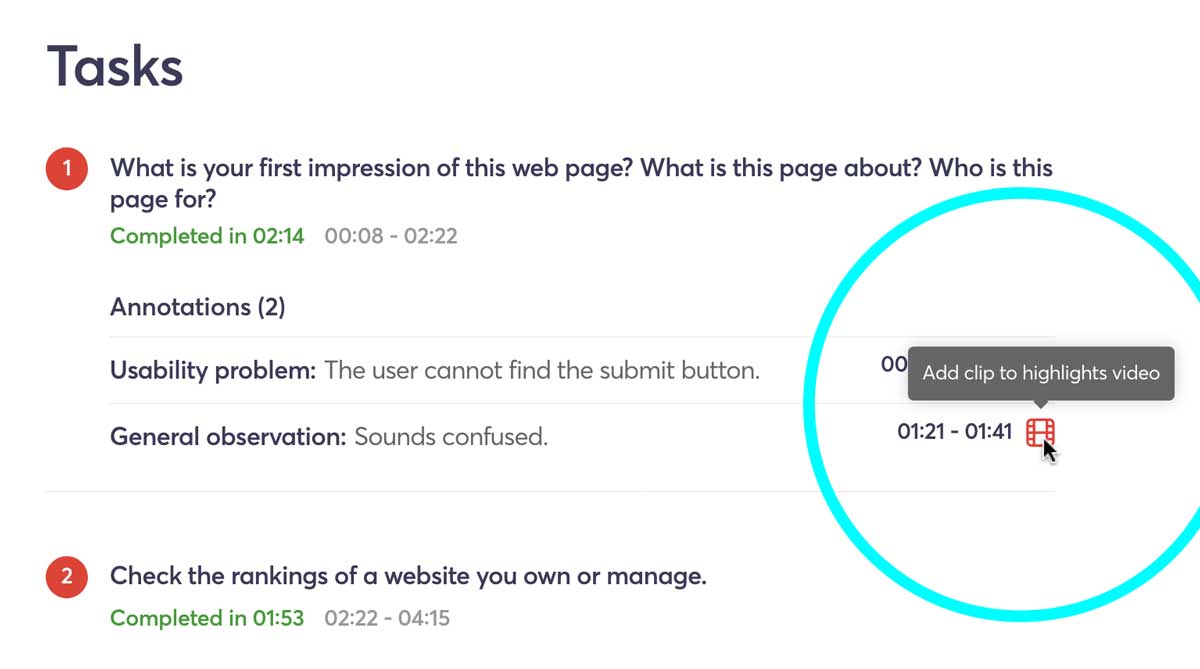
Add a clip to a highlights video from the tasks list
2. From the same icon in the annotation dialog:
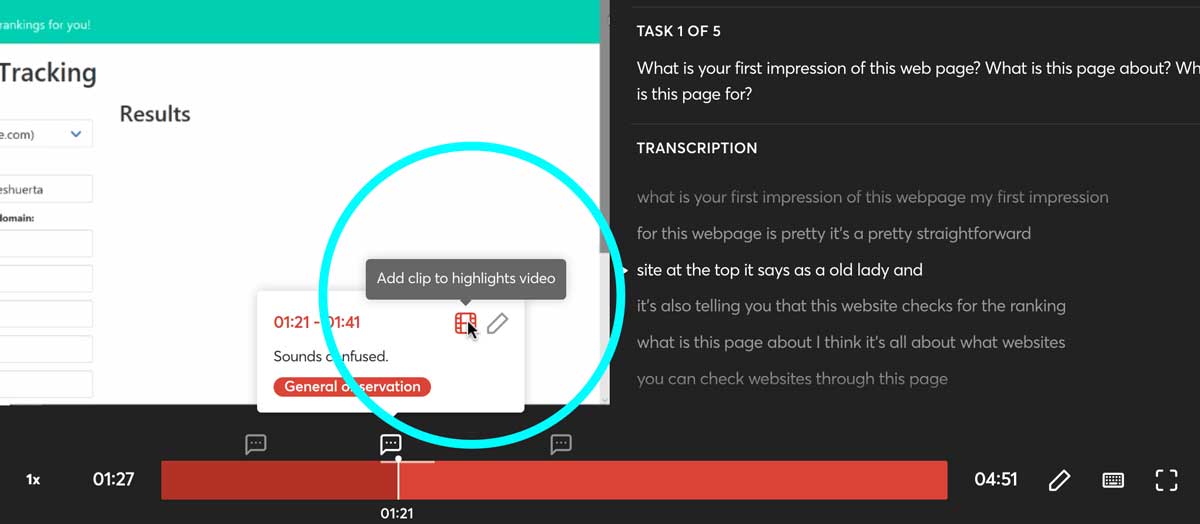
Add a clip to a highlights video from the annotation dialog
Clicking this icon will bring up a dialog in which you can choose an existing highlights video or create a new one to which you would like to add the clip. Once you’ve created a highlights video, you will be able to add annotations from any session in the same test.
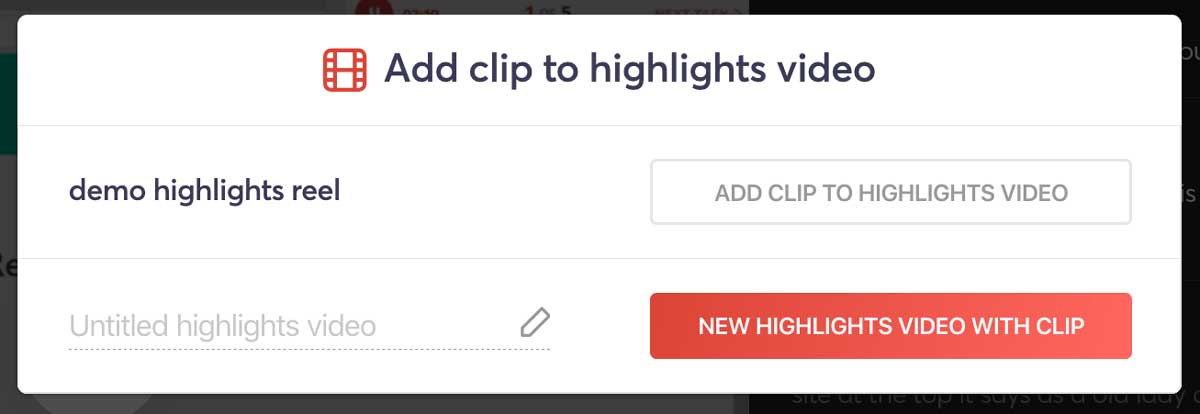
Choose or create the highlights video to which you want to add
3. Refine the highlights video
After adding clips, you can make additional edits to your highlights video. Find it from the highlights section of your project overview.
Find the highlights videos you’ve created
From this page, you can:
Change the titles of clips. The title text will appear before the clip plays in the video, so it’s crucial that the text is clear and descriptive.
Reorder the clips. This allows you to put similar clips together, and show the most important ones first.
Adjust the beginning and end times of clips.
Add supplementary text slides to help structure your video.
4. Download or share the video
When you’re done editing, you can download your highlights video locally or upload it as a private video directly to YouTube.
Five pieces of advice
Now that you know the basics, we have some tips to keep in mind when undertaking this process.
Stay objective when annotating
Your success as a researcher depends on keeping analysis and synthesis separate. As we mentioned in our article on mistakes to avoid when analyzing and reporting, you should initially focus on collecting valuable data points and only look for trends later.
When you are first watching videos and making annotations, you are in the analysis phase. You should be making objective observations about what users do and say. Avoid making assumptions about the reasons behind certain behaviors and keep solutions out of your mind as much as possible. Simply observe the sessions and make a note when something interesting occurs.
Synthesize your findings before creating the video
Userfeel makes it so easy to transform annotations into highlights that you might be tempted to get ahead of yourself and skip an important step in the usability testing process.
Annotations are raw data, and you will need to employ your right brain to make sense of that data and arrive at useful findings and recommendations. There are various ways to synthesize UX research data (affinity diagrams are one of our favorites), and you can find whatever works for you. What’s most important is that you don’t skip this step and jump straight from data gathering to reporting.
Think “highlights”
Your highlights video should not be a report of all of your findings; it should be a collection of engaging highlights.
This means that you should first develop a primary deliverable that contains everything you learned – whether it’s a written report, presentation, wiki page, or whatever works for your team (we cover the question of deliverables in more detail in our post on reporting).
Once you’ve created your primary report, identify the most essential findings to include in your highlights video. UX Consultant David Traxis recommends including no more than five findings and using no more than five clips to demonstrate each one. If you have more than five issues that you would like to show, find a way to group them under themes. As an example, two vague error messages and a process that does not indicate when it has finished might be grouped together as “poor feedback.” We recommend using additional text slides to label each finding or theme.
Open with a positive point
This tip actually applies to research reports in any format, but it’s significant enough to point out here.
Starting your highlights video with a finding that demonstrates a strength of the product – something that worked well – sets a positive tone. This puts viewers in a better mood, making them less likely to feel defensive and more open to the subsequent findings.
This practice is also a good reminder to yourself as a researcher that usability testing should evaluate what is succeeding as well as what isn’t.
Clearly and succinctly describe your clips
User interfaces contain a lot of visual information, and viewers may not immediately focus on the details you hope they will. For this reason, it’s important that you provide explanatory text to guide viewers through the highlights video.
When you review the titles of your clips and slides, revise the text to make it as simple as possible. Use plain language and be specific.
Conclusion
One of the benefits of remote unmoderated usability testing is having everything on video by default. Userfeel takes this benefit one step further and makes it a no-brainer to create highlights videos from the analysis work you’ve already done.
We hope these instructions give you the know-how and confidence you need to make the best highlights video possible. Still have questions? Get in touch with us at info@userfeel.com or leave a comment below.