

Running a usability test without reviewing and analyzing videos and sharing the results with other stakeholders has no value.
Usability testing is the best way to improve your website and app, if it leads you to action.
We have worked very hard to make the analysis process as easy and quick as possible.
The steps of the process are:
Annotate, Categorize, Export, Share.
Adding annotations
Adding annotations to videos while viewing them allows you to keep a log of interesting points and then share them with the rest of your team. An interesting point might be a usability problem, a comment by the user, a bug, or just a general observation.
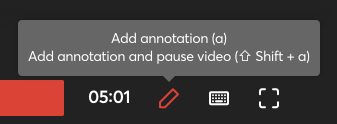
In order to add an annotation, you can either click on the pencil icon or press the "a" shortcut key. Using shortcut keys to add and edit annotations, go back and forward the video, and increase or decrease video speed makes it easy to add annotations while viewing videos.
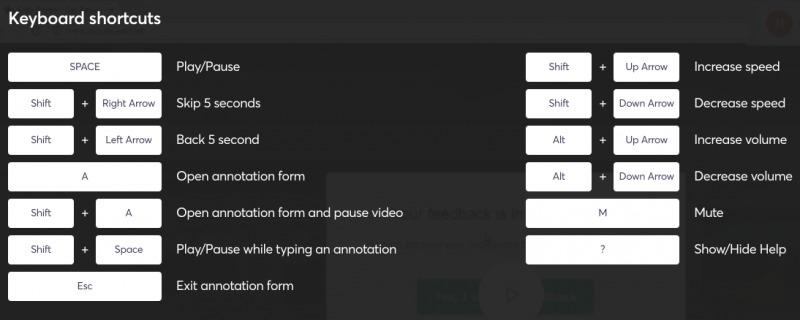
It takes some practice to get acquainted with all of the keyboard shortcuts, but once you do, you'll be much faster than when using the mouse. You can click on the keyboard icon or press the "?" key to see all of the keyboard shortcuts that are available.
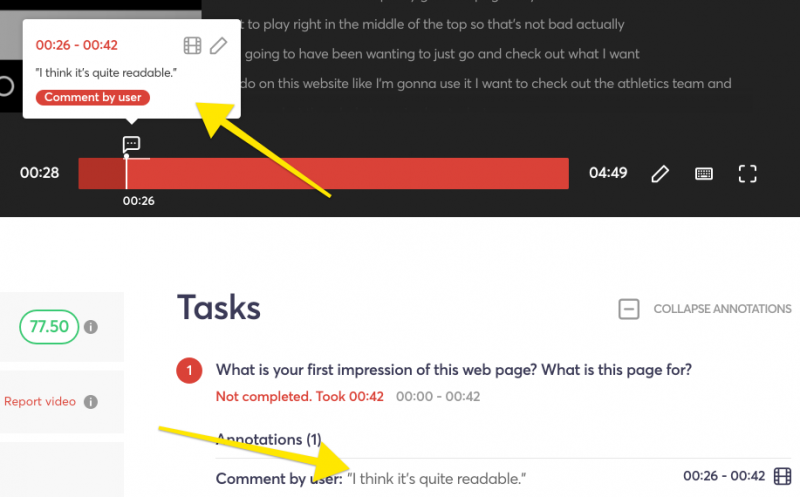
After you add an annotation, it appears on both the video timeline and under the corresponding task.
How many annotations should I add?
There's no definitive answer on how many annotations you should add. It depends on how thorough and detailed you need to be. A usual rate is about one per minute, but again, it's more up to you and the data you need to remember.
Categorizing annotations
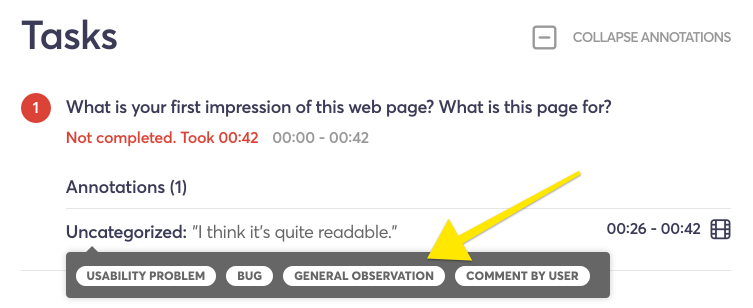
After you have added annotations, it is helpful to categorize them. You can do that by hovering over each annotation under the tasks section. You will get a menu with the four types of annotations. Just click on the one you need, and the annotation will be tagged.
Exporting annotations
After you have added and tagged the annotations, you may export them to either Excel or plain text format in order to embed in your reports.
You will get a table that contains all session data (including times and ratings) along with your annotations. Each line will also have a link that points to the exact point in the video!

Adding annotations to highlights videos
A great way to share your findings with the rest of your team is to create a highlights video showing the most critical points. Just click on the film strip icon and the part of the video that is tagged with the annotation will be added to a highlight reel.
We have tried to make the analysis process as hassle-free as possible. We would be glad to hear your comments on how we could improve it further. Just send us your thoughts via the contact form.